A microscopic 0.1 mg weighing error is all it takes to ruin a complex formulation or scrap an entire production batch. Stop fighting frustrating reading drifts—master these 7 factory-verified tips to eliminate environmental interference, secure rock-solid data, and maximize the lifespan of your analytical balance.

1. Optimize Your Installation Environment
The heart of a high-precision scale is its Electromagnetic Force Restoration (EMFR) sensor. While incredibly accurate, EMFR technology is highly sensitive to its physical surroundings.
To prevent environmental noise from compromising your data:
- Use an Anti-Vibration Table: Place your balance on a dedicated, vibration-resistant marble laboratory bench to absorb structural tremors.
- Control the Climate: Keep the instrument far away from HVAC vents, radiators, and doors. Drafts and sudden temperature shifts cause the internal mechanical components to expand or contract, leading to thermal drift.
- Avoid Direct Sunlight: UV exposure and localized heating from windows will drastically disrupt sensor stability.
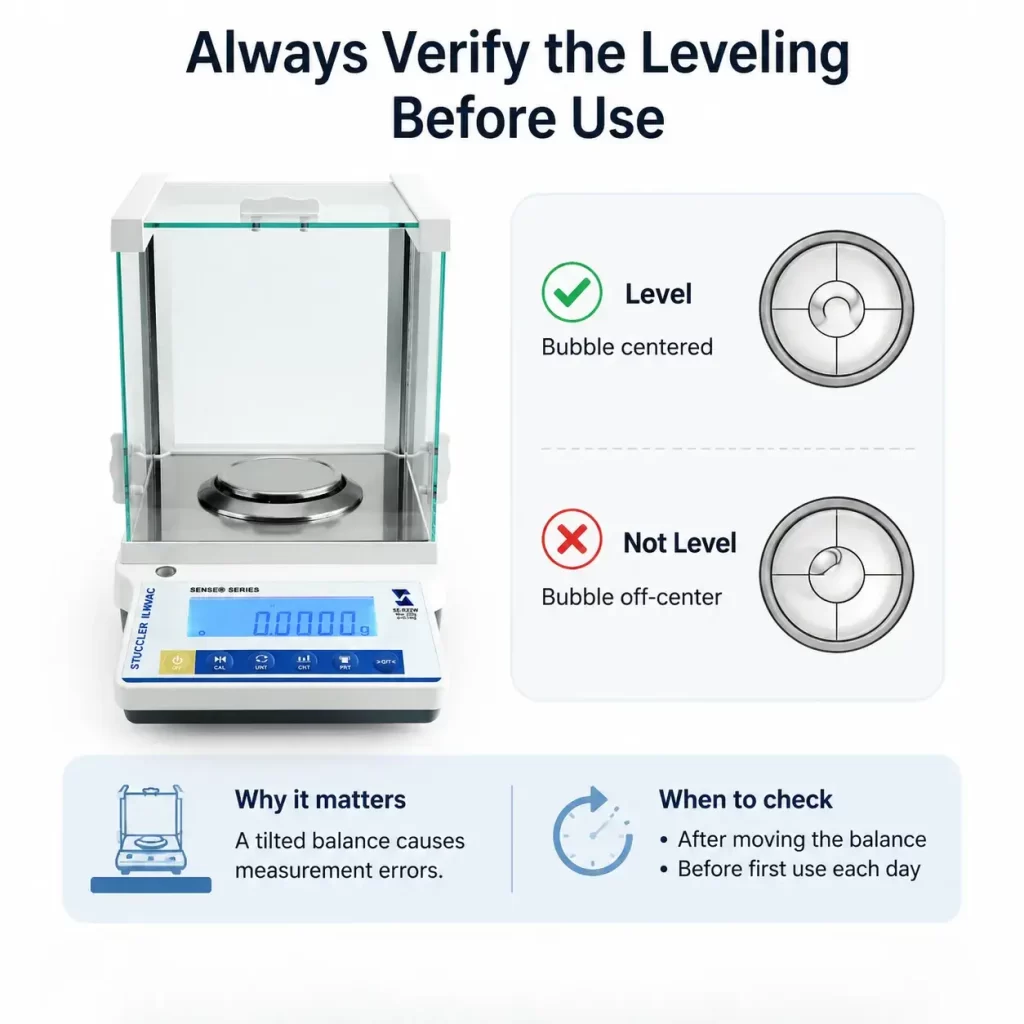
2. Always Verify the Leveling Before Use
Accurate weighing relies entirely on perfect vertical alignment with the gravity vector. If your analytical balance is tilted, the weighing pan experiences downward force at an angle, resulting in a significant systematic error that calibration cannot fully fix.
Make it a strict habit to check the leveling bubble (usually located at the rear or front of the base) every time the instrument is moved, and before starting your first measurement of the day. Ensure the air bubble rests perfectly dead-center in the indicator circle.
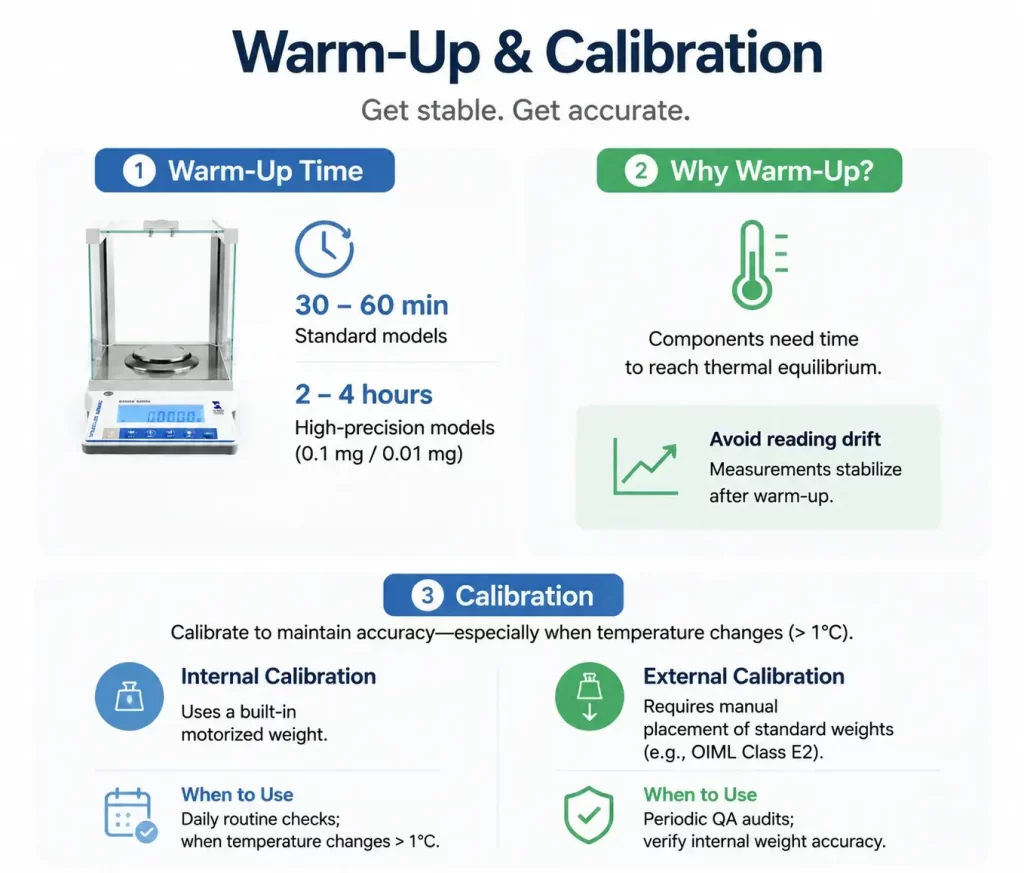
3. Master the Warm-Up and Calibration Protocols
Electronic components require thermal equilibrium to operate stably. If you attempt to weigh a sample immediately after plugging the unit in, you will watch the numbers drift as the internal circuitry heats up.
- Warm-Up Time: Allow a warm-up period of at least 30 to 60 minutes after powering on. For highly sensitive models with 0.1 mg (or 0.01 mg) readability, a longer warm-up of 2 to 4 hours is highly recommended.
- Calibration: Temperature fluctuations alter the density of air and the physical state of the load cell. You must calibrate to compensate for this.
| Calibration Type | How It Works | When to Use It |
| Internal Calibration | Utilizes a built-in motorized weight. | Daily routine checks; whenever the lab temperature changes by more than 1°C. |
| External Calibration | Requires manual placement of standard weights (e.g., OIML Class E2). | Periodic QA compliance audits; verifying the internal weight’s accuracy. |
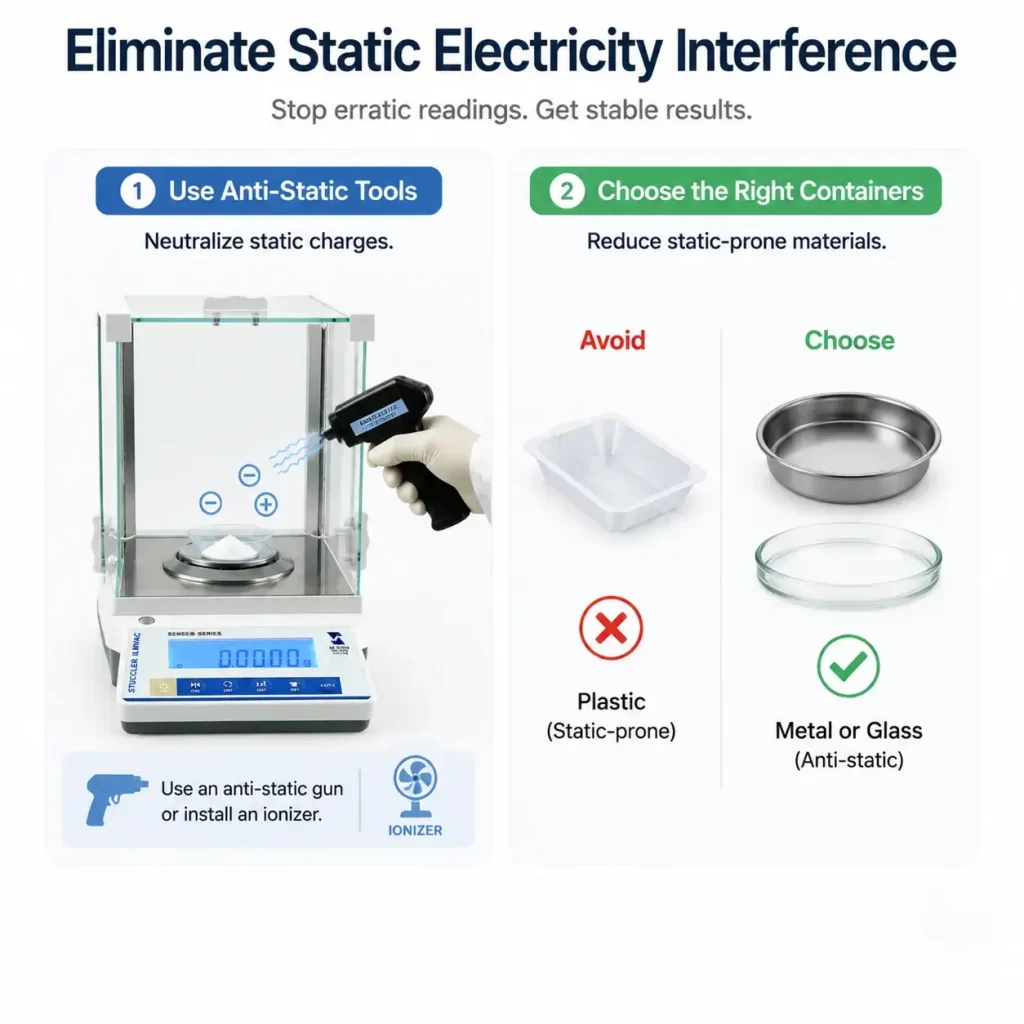
4. Eliminate Static Electricity Interference
If your readings are jumping up and down erratically without settling, static electricity is the likely culprit. Static charges create invisible attractive or repulsive forces between the weighing pan, the sample, and the glass draft shield.
This is especially common in dry, low-humidity environments when working with fine powders or plastic weigh boats.
- Use anti-static tools: Neutralize charges by passing an anti-static gun over the sample, or install a static ionizer near the weighing chamber.
- Change your containers: Whenever possible, swap out static-prone plastic containers for conductive metal vessels or borosilicate glass.
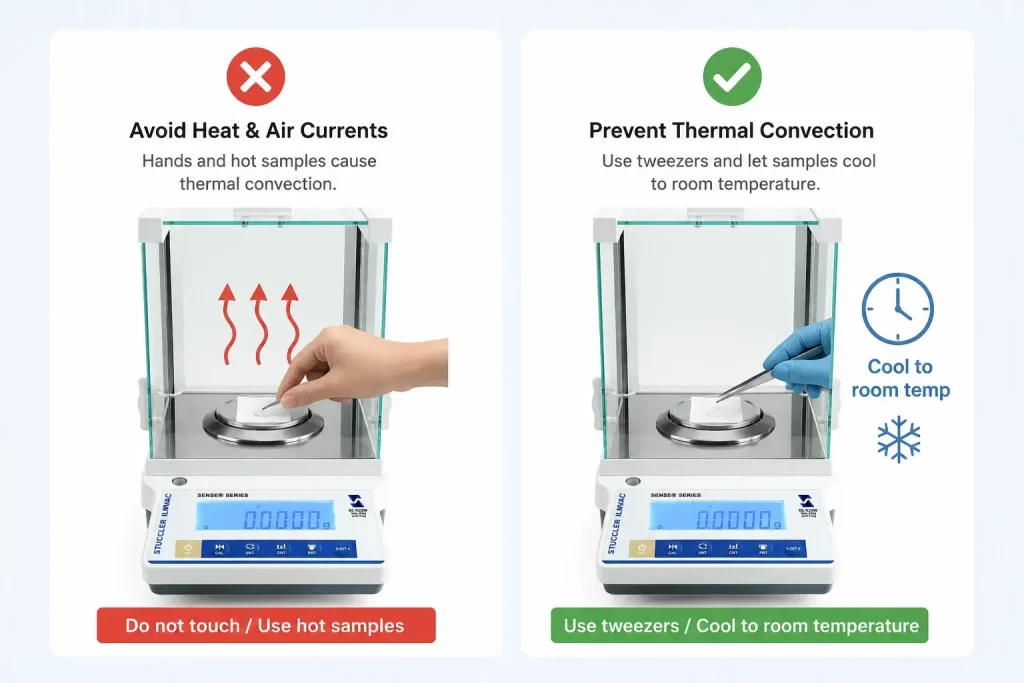
5. Prevent Thermal Convection During Sample Handling
Heat transfers easily, and it is a major enemy of the 0.1 mg precision scale. Body heat from your fingers or residual heat from an oven-dried sample can generate micro-updrafts (thermal convection) inside the draft shield. These faint upward air currents lift the pan, making the sample appear lighter than it actually is.
- Never use bare hands: Do not touch the weighing paper, boats, or calibration weights with your fingers. Always use dedicated, clean tweezers.
- Wait for room temperature: Ensure that all samples, especially those fresh from an incubator, desiccator, or drying oven, have completely cooled to ambient room temperature before placing them on the pan.
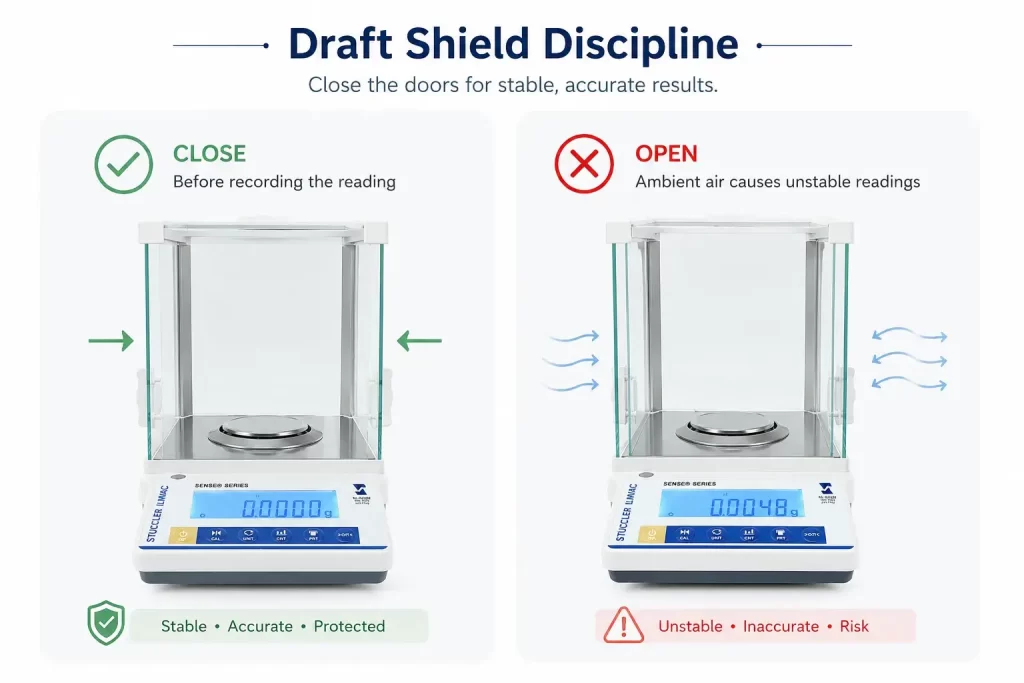
6. Practice Strict Draft Shield Discipline
The draft shield exists for a reason. High-precision analytical balances are so sensitive that the airflow caused by an operator’s breathing, or a colleague walking past the bench, will be detected by the sensor.
To guarantee a stable reading:
- Fully close the doors: Before recording your final measurement, slide the left, right, and top glass doors completely shut.
- Work efficiently: Minimize the time the draft doors remain open to prevent the laboratory’s ambient air from disrupting the stable microclimate within the weighing chamber.
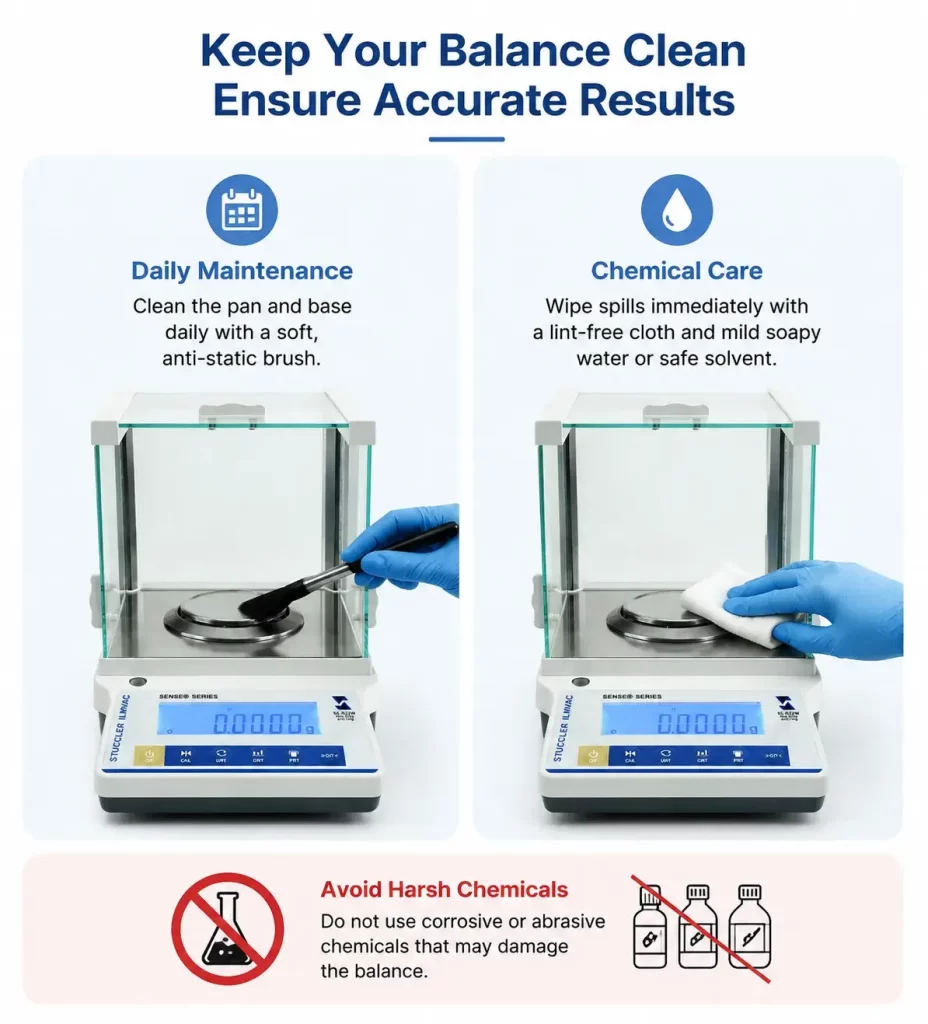
7. Implement Standardized Cleaning Procedures
A dirty scale is an inaccurate scale. Spilled powder, dust, and chemical residues add unaccounted mass to the pan. More critically, if particulate matter seeps into the sensor gap beneath the weighing pan, it can cause catastrophic, irreversible equipment failure.
- Daily Maintenance: Clean the base and pan daily after use with a soft, anti-static brush.
- Chemical Care: If a spill occurs, wipe it immediately with a lint-free cloth lightly dampened with mild soapy water or a safe lab solvent. Strictly avoid using highly corrosive chemicals that could degrade the protective coatings on the balance components.
Frequently Asked Questions (FAQs)
Q1: Why is my analytical balance reading constantly drifting?
A: Drifting is typically caused by environmental factors. The most common reasons are static electricity buildup, thermal expansion due to a lack of warm-up time, or micro-drafts from an improperly closed draft shield or nearby HVAC vent.
Q2: How often should I calibrate my high-precision scale?
A: At a minimum, you should trigger an internal calibration daily before your first weigh-in. You must also recalibrate anytime the balance is moved, or if the laboratory temperature fluctuates by more than 1°C to 2°C.
Q3: Can I leave my lab balance turned on all the time?
A: Yes. Many laboratories leave their analytical balances plugged in and on “standby” mode permanently. This maintains internal thermal equilibrium, allowing you to bypass the daily 60-minute warm-up requirement.
Q4: What is the difference between internal and external calibration?
A: Internal calibration uses an automated, built-in weight mechanism inside the balance to self-adjust at the push of a button. External calibration requires the operator to manually place high-precision, certified standard weights onto the pan to verify and adjust the scale.
Q5: Why shouldn’t I use my hands to place the weighing boat?
A: Bare hands transfer heat, which causes upward thermal air currents inside the weighing chamber, making the load appear lighter. Additionally, the natural oils and moisture from your skin add unexpected mass to the container. Always use tweezers.
Summary
Achieving unwavering accuracy with your laboratory analytical balance requires a combination of proper setup and disciplined operating habits. By optimizing your environment, verifying your level, mastering calibration protocols, and eliminating invisible enemies like static and thermal convection, you protect the integrity of your research. Furthermore, strict draft shield discipline and routine cleaning will ensure your equipment remains a reliable asset for years to come.
If you are outfitting a new laboratory, upgrading your quality control department, or seeking industrial-grade weighing solutions, source your equipment from a manufacturer that understands the nuances of precision. Stuccler operates its own dedicated manufacturing facility, delivering true factory-direct precision. Explore our robust catalog of high-performance laboratory equipment and secure a Stuccler Laboratory Analytical Balance today to bring uncompromised accuracy to your benchtop.